USB-C Modding Adventure: Upgrading My Bose QC35 II Headset

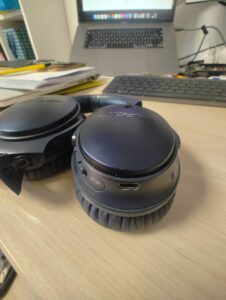
In my quest to embrace the USB-C standard as much as possible, I turned my attention to my trusty Bose QuietComfort 35 II headset, which still relied on the outdated micro-USB port. The journey to upgrade it was both challenging and rewarding, and I’m excited to share the process with you.

The Inspiration

I stumbled upon a GitHub project that offered plans for a new electronic board with USB-C compatibility. However, the components were incredibly tiny, and I wasn’t keen on diving into micro-soldering. Fortunately, I discovered that the Bose QuietComfort 45 (QC-45) uses USB-C, and its electronic board is somewhat compatible with the QC-35. 

Gathering the Parts

I found the QC-45 PCB on AliExpress for just 8 euros, which was a steal. With the PCB in hand, I was ready to dive into the mod.. but first, I had to tackle the iPod that had been gathering dust on my desk for far too long  😁

Dismantling the QC-35

The first step was to disassemble the QC-35:

      1. Remove the Foam Earcup and Sheet: Gently remove the foam earcup and the foam sheet across the speaker grill on the right earpiece.
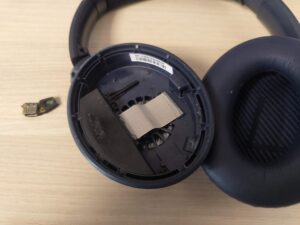
      2. Unscrew the Outer Shell: Remove the three Philips screws holding the metal outer shell in place. This reveals the USB daughter board and mainboard.
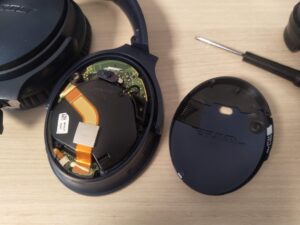
      3. Detach the Main Cable: Cut away and remove the silastic holding the cable for the mainboard, and unplug the main cable.
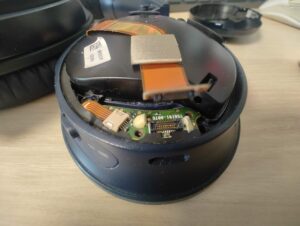
      4. Remove the USB Board: Unscrew the two Philips screws holding down the USB board and remove it.
      5. Detach the Button Board Cable: Gently pull the button board cable from the USB board.
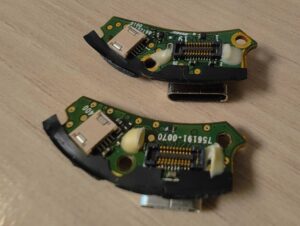
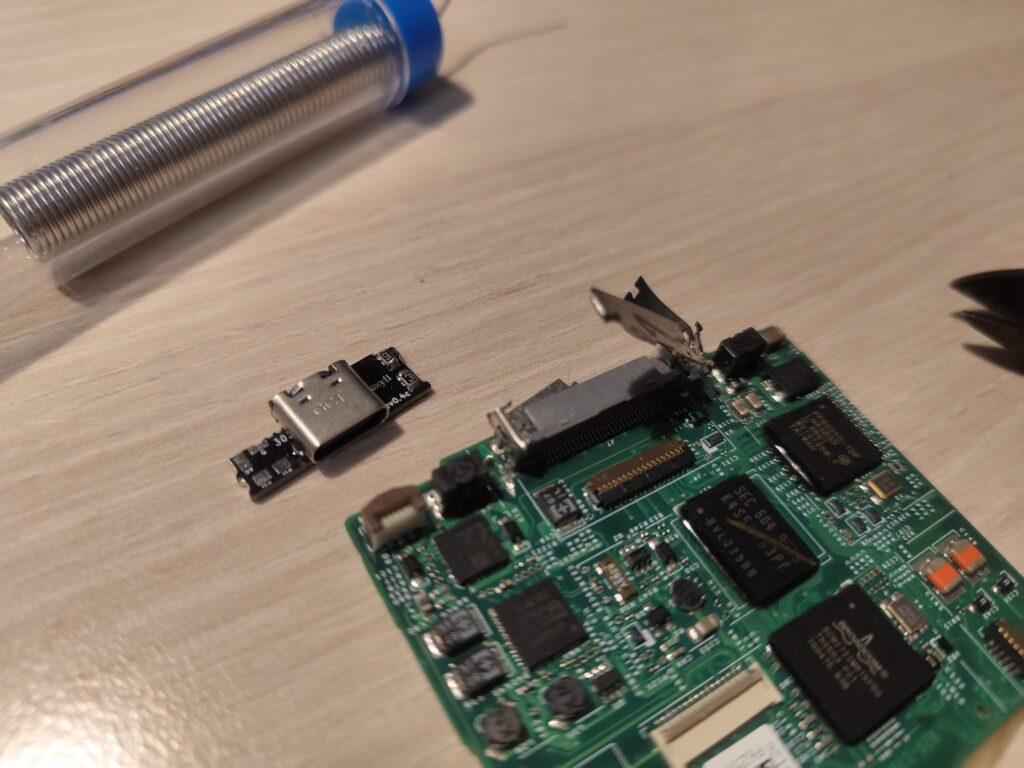
        Old and new PCB (USB-C on top)

Modifying the Housing

The USB-C port requires a larger hole, so I applied some tape to the USB-C port and filed it gently to create a template. A Dremel with a round head was perfect for enlarging the hole.
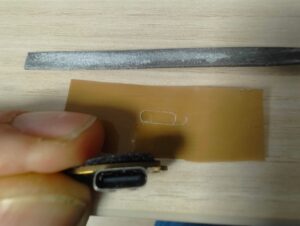
Additionally, the interior needed some adjustments: remove the small square and enlarge the side by 0.5mm on each side to accommodate the new USB-C board.
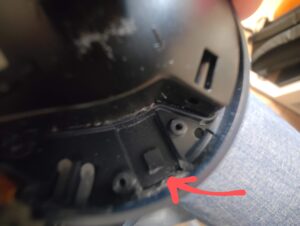
At this point, you can plug everything back in to check the fitting.

Addressing the Blue LED Issue

You might notice that the blue LED still shines even when the headset is off. This is due to a small power leakage on the QC-35, which becomes visible with the new PCB. There’s a tiny resistor that controls the blue LED.
Removing it will solve the issue while keeping the orange and white LEDs functional. This operation is tricky due to the component’s size, so I chose to rip it off with a tweezer instead of attempting to unsolder it.
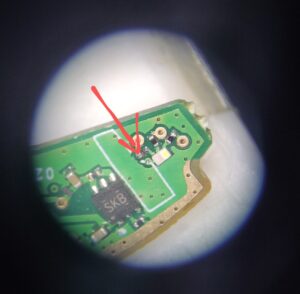
Credit to drose6102 for this picture

Reassembling the Headset

Finally, put everything back together.
The 2 Philips screw will probably have an angle, but that’s not an issue, just be gentle.
I added some hot glue to the main cable to ensure it stays secure. The hole isn’t perfect, but it’s barely noticeable from a meter away, so I’m satisfied with the result.
Conclusion

Upgrading my Bose QuietComfort 35 II to USB-C was a rewarding project that brought my headset into the modern era. If you’re looking to do the same, I hope this guide helps you on your journey. Just remember to take your time and be careful with the delicate components. Happy modding!

Reviving Retro: My Journey into iPod Modding

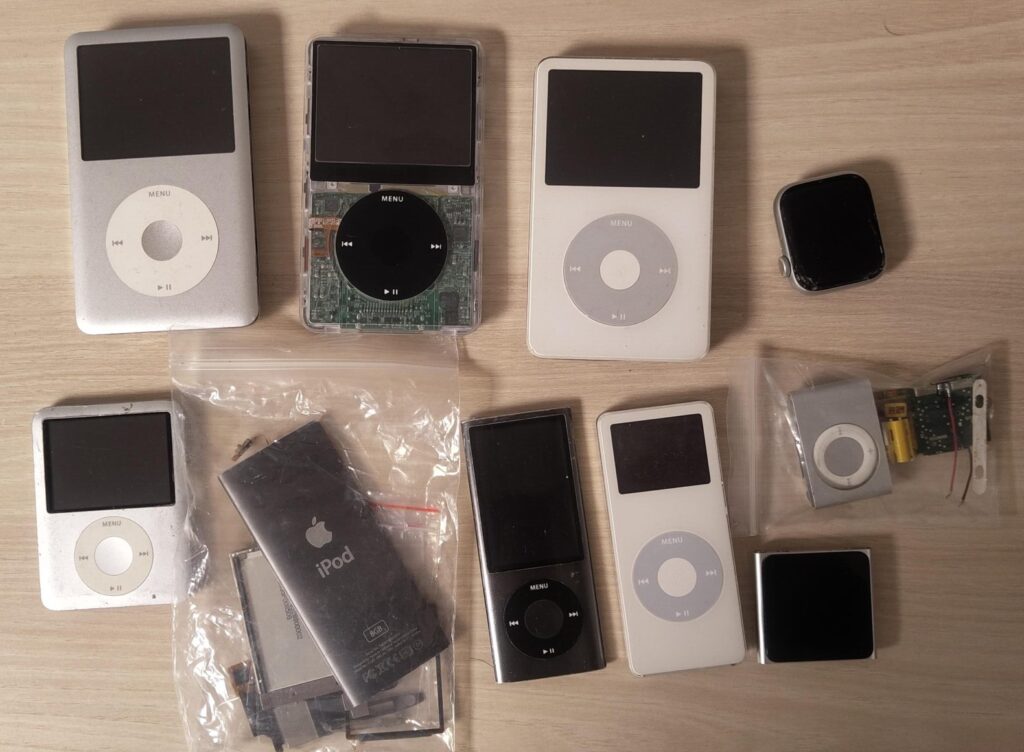
Last November, after binge-watching some YouTube videos (mainly Zac Builds one), I couldn’t resist the urge any longer—I dove headfirst into the world of iPod modding. Armed with enthusiasm and a bit of naivety, I purchased eight vintage iPods, eager to breathe new life into these classic devices.

The Hunt
I scoured local used equipment platforms, striking both good and bad deals, and ended up with a diverse collection:

      • iPod Classic 5th Gen
      • iPod Classic 5.5th Gen
      • iPod Classic 6th Gen
      • iPod Nano 1st Gen
      • iPod Nano 3rd Gen (mistakenly thought it was a Classic 6th Gen)
      • iPod Nano 4th Gen
      • iPod Nano 5th Gen
      • iPod Nano 6th Gen (the only one I originally owned)
      • iPod Shuffle 2nd Gen
I’ve already replaced the cover of the Classic 5th Gen with a transparent one, offering a glimpse into its inner workings.

A friend also gifted me an old Apple Watch to revive, but alas, luck wasn’t on my side this time, and the parts proved too costly.

The Vision
My goal was ambitious: to bring these 21st-century upgrades to the three Classic iPods:

      • Replace the hard drive with an SSD
      • Install a larger battery
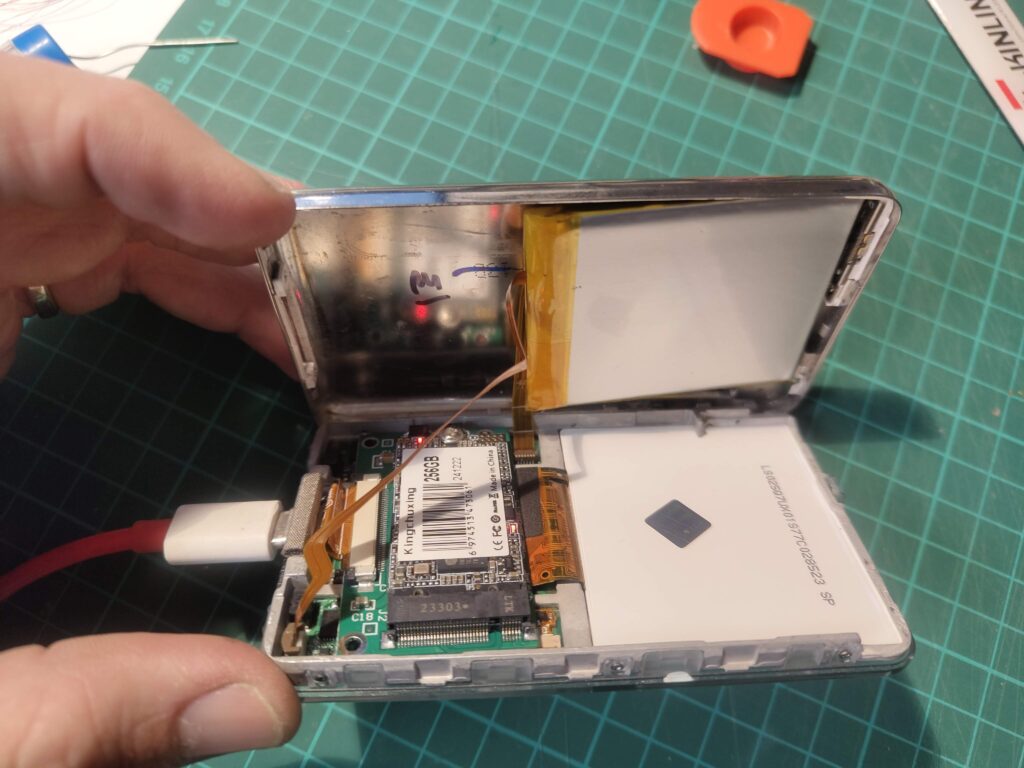
      • Add a USB-C connector
      • If possible, integrate Bluetooth for added convenience

The Process
Opening the iPod Classic was a challenge, requiring patience and precision. The 5th Gen was notably easier than the 6th Gen. Once inside, I tackled the easier modifications first:

      • Replaced the cover with a transparent one
      • Upgraded the battery from 500mAh to 3000mAh
      • Installed an SSD sourced from AliExpress
 

Next, I added USB-C using parts from a reputable modder Oxyll. This step involved micro-welding, but with some flux and patience, I managed to pull it off.

I had to torn off the 30-pin connector, and didn’t had a hot-air machine to un-weld it


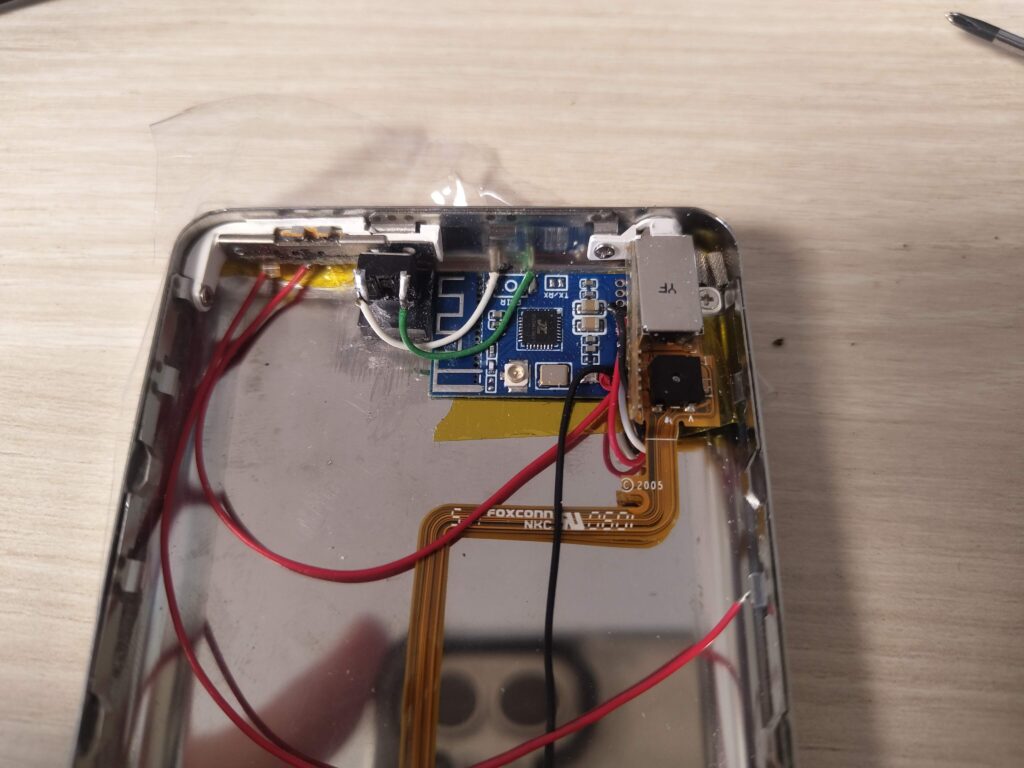
The final and most complex modification was adding Bluetooth. This required precise welding, gluing, and additional parts, guided by tutorials from Parts Plus Pods.

Bluetooth mod installed
Bluetooth mod installed into a tiny space
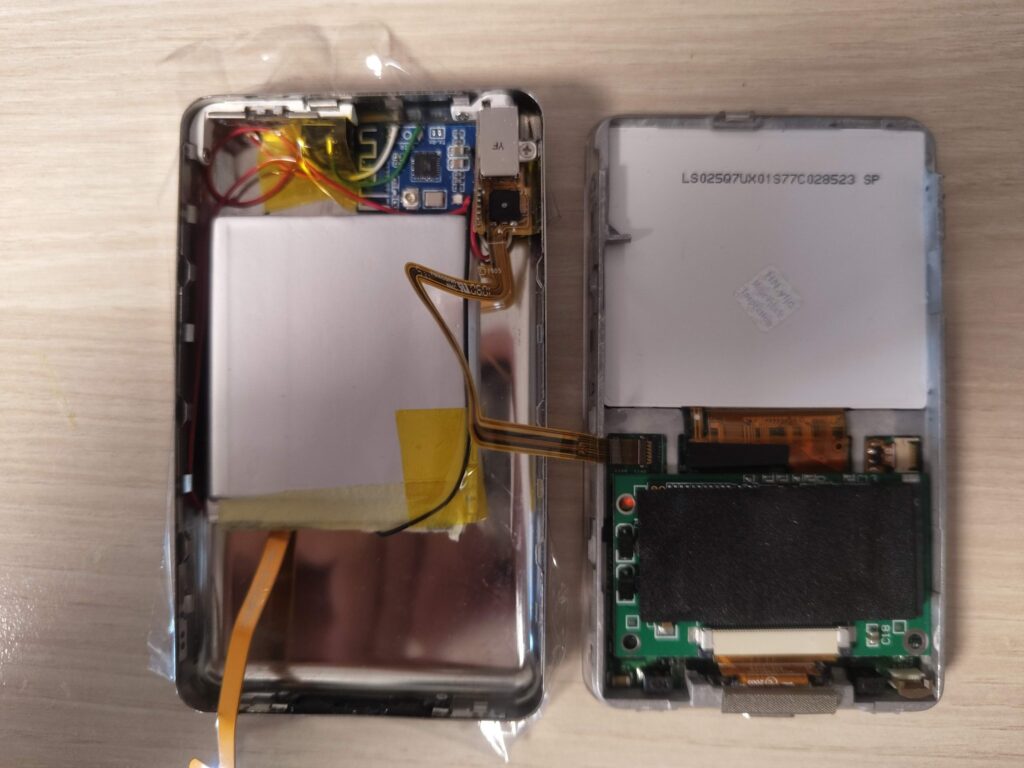
Finalized version of the iPod before closing

The Outcome
The result is stunning—a beautifully modded iPod Classic 5th Gen that combines retro charm with modern functionality. I had to replace the thin backplate with a thicker one to accommodate the new components, but it was worth it for the added Bluetooth capability.

Future Plans
The very last step will be installing Rockbox, a new firmware that allows MP3 loading via USB, eliminating the need for iTunes or a Mac.

With the Classic 5th Gen complete, I’m eager to tackle the remaining two Classics. Meanwhile, I’ve had a few setbacks: the Shuffle’s new battery isn’t charging, I accidentally ripped a flex cable in the Nano 4th Gen, and I damaged the Nano 1st Gen’s screen (though it’s still replaceable).

Conclusion
iPod modding has been an incredible journey filled with challenges and triumphs. It’s not just about upgrading old tech; it’s about preserving a piece of history while making it relevant for today’s users. Stay tuned for more updates as I continue to breathe new life into these vintage gems!

OSINT : How I find back owners when I found something

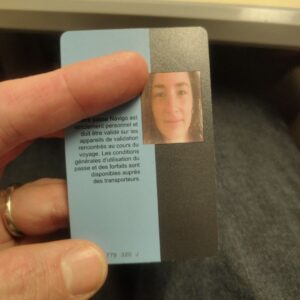
This time, the scene unfolds at Gare de Lyon, a bustling French station, where I stumbled upon a transportation card belonging to someone we’ll call Anna.


The card bore a picture, so I scanned the crowd, calling out “Anna” in hopes of catching her attention. Alas, no response.

Undeterred, I turned to the internet, searching for any trace of Anna. I found a LinkedIn profile that seemed to match. With common names, it’s not always straightforward, but my instincts told me I was on the right track. Armed with her current company’s name, I crafted emails to [email protected]/fr and [email protected]/fr. To my delight, it worked!

Within minutes, I received an Out of Office (OoO) reply containing a mobile phone number. I sent a text message, and to my surprise, it reached the rightful owner of the card.

Anna was initially taken aback by how I obtained her number but was grateful for my efforts to return her lost item. This story is just one of many in my ongoing quest to reunite lost items with their owners, a journey that began in 2020 when I found an iPhone in the forest.

Since then, I’ve honed my skills and achieved an impressive 80% success rate. I even created an Instagram account to document my adventures.

In the end, I believe in the power of kindness and the satisfaction of helping others. I would be grateful if someone did the same for me, so I pay it forward.

Little did I know, my hobby has a name: OSINT, or Open Source Intelligence. It involves using publicly available data to piece together information and create profiles. I’ve come to enjoy the challenge and the thrill of solving these mini-mysteries. Even if my friend Dimitri finds it a bit unsettling 😅, I find it incredibly rewarding.